Make superior drone 360 panos
If you have a DJI drone, the chances are that you can create 360 spherical panos like this
It’s remarkable what cameras can do these days, and where they can go. Drones can now take your view hundreds of feet into the air. In this article I explore how familiar photographic software tools from Adobe, Photoshop and Lightroom, can also rise – with drones – to the task, especially when things don’t quite go to plan at altitude.
Drone panorama potential

Some camera drones, like my own DJI Spark, can produce amazing panoramas shot from high in the sky. The Spark may only be DJI’s simplest and cheapest drone that has a passable camera on board, but it can shoot vertical, horizontal and spherical panoramas, including full 360 degree spherical panos. Actually, that’s not quite correct because the Spark’s camera can’t be tilted upwards, not all the sky above the drone can be captured. For that you need a Parrot Anafi drone. But I’ll show you how to work around that later in the article.
Stitching dozens of automatically shot views
With the Soark spherical panos are assembled from no less than 46 individual 12 megapixel shots. That’s over 550 million pixels. The Spark dutifully executes each shot automatically and the process takes about a minute and a half while hovering in. The amount of potential in all those pixels is mind-boggling, but mostly superfluous for the most-used application of panos like these – posting to Facebook! I’ll show you how to condense all that image data down to a 9 megapixel JPEG that will look stunning online.
DJI’s own GO app, which controls the drone while it’s in flight, can create a 4096×2048 pixel spherical pano JPEG, but it’s heavily compressed. Your smartphone or tablet needs to be connected to your Spark, which must be powered up, in order to run the stitching process. There is also little avenue for convenient adjustment of those 46 images beforehand, which is a key point because it’s quite easy to end up with a pano that is too dark or too light.
Bad exposure? Lightroom to the rescue!
If you aren’t familiar with Lightroom or similar photo editing workflow applications, one of its fundamental benefits is in enabling you to knock a lot of similar images into shape very quickly. In my example the 46 images that my Spark produced were quite badly under-exposed. When you start the process to capture those images the drone’s camera will freeze the exposure, which is what you should do when shooting to stitch multiple shots. The problem is that the exposure value that gets frozen is often based on what the drone sees when it’s not pointing at the most interesting part if the view below. If the sun is in direct or partial view, the exposure compensates and everything else will be too dark. When you’re concentrating on keeping your quadcopter in the air, details like this can be easily overlooked.

With Lightroom you choose the most important of the 46 images to be stitched, take as long as you need to adjust it until it’s perfect, then select all the others and synchronise the adjustment settings. In seconds, the previews of all 46 images will be updated. Adjustments you can make include brightness, contrast, shadow brightness, highlight retrieval, colour balance, sharpness, and much more. You can even adjust the density of selected hues, so you can independently darken the blue in the sky, if required.


Create a new set of corrected images to be stitched
By now you can see what your corrected images will look like when rendered, but they don’t yet exist as replacement image files ready to be stitched. But Lightroom can create the new files in no time. Beforehand you may choose to reduce the dimensions of these files because there is no need to stitch 12 megapixel components and the process may well tax your computer depending on its specification.
The cool ICE app from Microsoft Research
Lightroom, itself, can stitch images to create panoramas, including spherical types, but its automated alignment sometimes fails to arrange Spark component images correctly. Therefore, I recommend you use a free application from Microsoft Research, called ICE or Image Composite Editor. This is a very powerful program that can do a lot of very clever things but, thankfully, for our needs here, you barely have to adjust any settings, so it’s easy to use. I recommend choosing an output pixel size of 6000 across.
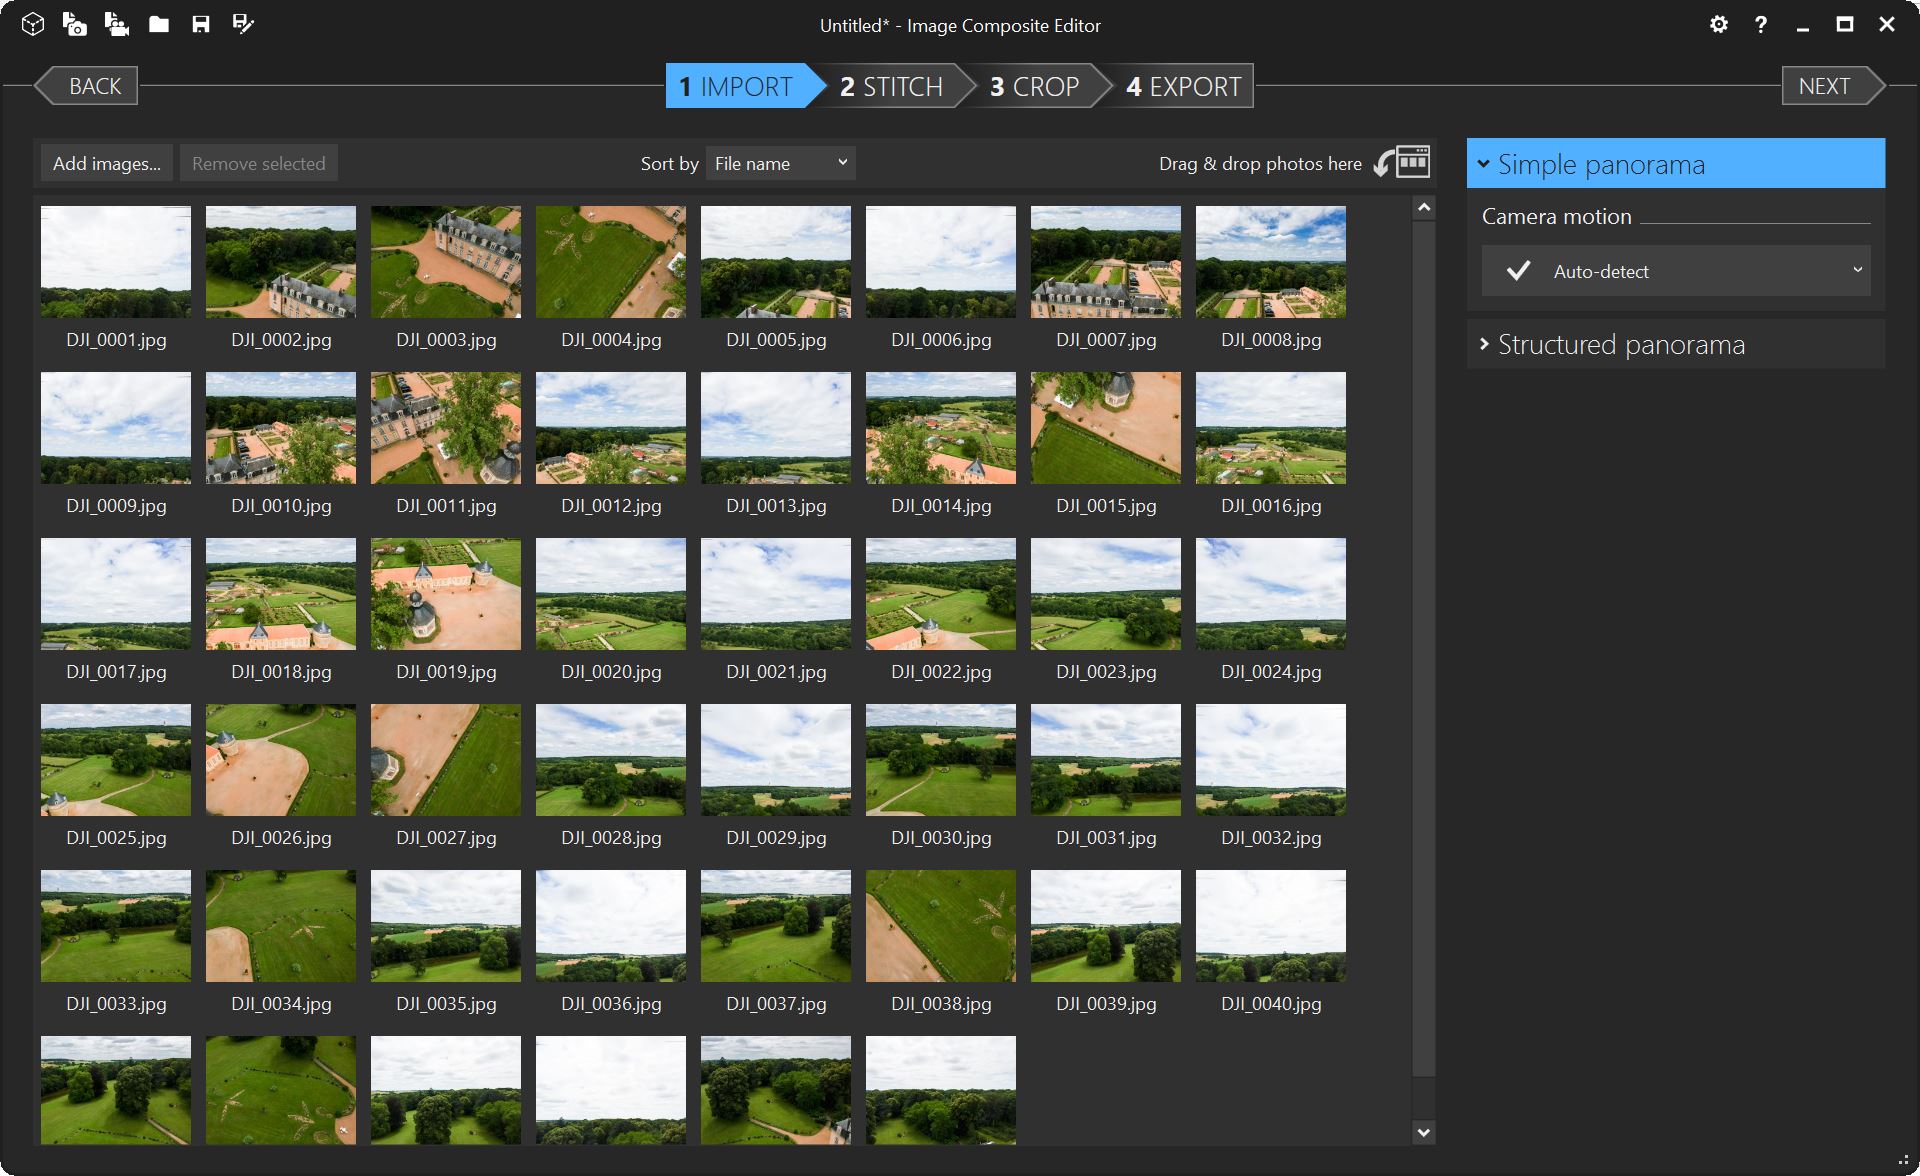


ICE stitches your 360 degree view into a two-dimensional flat JPEG image. By convention, the flat view should have an aspect ratio of 2:1. But you will notice that the shorter dimension is smaller than half of the (6000 pixels) longer dimension. This is because, if you recall, the drone can’t point its camera upwards enough to capture all the sky above it. But we can fix it!
Create the missing sky and export a Facebook-ready spherical pano in Photoshop
Load the flat view image into Photoshop CC. Use the Photoshop Canvas Resize tool to increase the vertical size of the image to 3000, by extending the top only. This brings the image to the required 2:1 aspect ratio (6000×3000). The extension, however, contains no sky. Fortunately, Photoshop’s Content Aware magic can be used to convincingly fake the missing sky based on the existing sky. Use the auto selection tool to mask the blank area and then right-click and choose Content Aware Fill. Execute this and after a couple of seconds the blank area will be filled with missing sky.


Final stage – save as an identifiably spherical pano image file
For 3D panoramic viewers to be able to show your spherical pano as intended, a version of the file needs to be created with the required meta tags embedded. To do this go to the 3D menu in Photoshop and select ‘New Panorama Layer from Selected Layer’. The flat view will then change to a navigable 360 view that you can explore by pushing and pulling with your mouse. Finally, again from the 3D menu use Export Panorama – and you’re done.


The resulting file can be shared to Facebook and other sites set up to view 360 spherical panoramas. It can also be used in some apps to create other types of 360 view, like so-called ‘tiny planets’ and 360 transformation animations.
I personally find that Facebook’s viewer adds too much perspective. This can probably be compensated for and I will be looking into that. If you look at the view on this page, it’s much better, as is the way the view is handled on, for example, Google Photos.
That’s it for now – why not use the comment section below to link to your own 360s?